How ro use insta 360 pro2 cameta
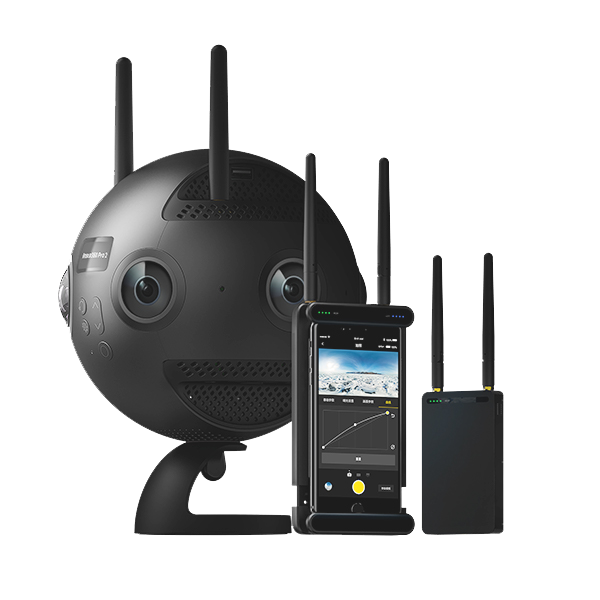
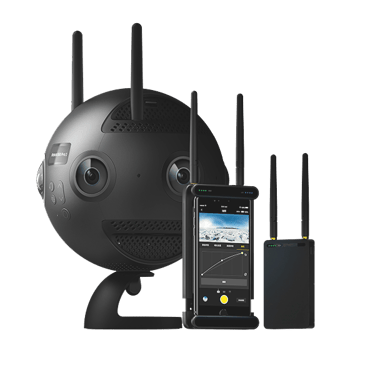
The world of virtual reality (VR) and immersive filmmaking is rapidly expanding, and at the heart of this revolution are powerful cameras like the Insta360 Pro 2. Whether you are a filmmaker, VR content creator, or business owner looking to showcase products, properties, or experiences, knowing how to correctly set up and operate the Insta360 Pro 2 is the first step toward producing truly stunning 360° visuals.
INSTA 360 PRO2 CAMERA USESHOW TO OPERATE INSTA 360 PRO2 CAMERA
⚙️ The Professional Touch: How to Master the Insta360 Pro 2 for Your Next Shoot
The Insta360 Pro 2 is one of the most powerful cameras on the market—it’s the engine behind professional virtual tours, cinematic films, and high-stakes industrial content. But to unlock its true potential, you can’t just press record; you need a strategic, professional workflow.
At 360 vr photography, we’ve perfected this process. Here are the essential steps we follow to ensure every shot is flawless, straight from my experience, Viral Gala.
1. The Critical Site Survey: Checking the Scene
Before the camera even leaves its case, a thorough check of the environment saves hours of headache in post-production.
Safety First: Ensure the location is safe and accessible for the equipment and crew. High-end gear demands a stable, secure setup.
Obstruction Check: Walk the full $360^{\circ}$ perimeter. Look for power lines, light fixtures, or oddly placed trash bins that will interfere with the view and ruin the immersion.
Tidy Up the Nadir: Confirm the shooting spot is clean and tidy. Remember, the $360^{\circ}$ view captures everything—even small clutter or footprints can look distracting in the final $\text{VR}$ experience.
2. Prepare the Powerhouse: Equipment Setup
The Pro 2 is a professional system, which means it demands professional readiness.1
Power Management: Fully charge the camera batteries, or, for long takes or live streaming, ensure you have a stable, reliable power supply plugged in.2
Card Synchronization: Insert cards in all six slots (one per lens).4 Missing a card means losing a chunk of your sphere! Also, prepare the main card or drive for faster transfer.
Antenna System: Attach the Farsight antenna system.5 This is crucial for rock-solid wireless stability and, critically, for accurate $\text{GPS}$ tracking and live remote monitoring. [Insta360 Pro 2 User Manual: Setup]
Stable Base: Mount the camera on a strong, stable tripod.6 Avoid flimsy stands—any vibration will cause serious stitching errors in $360^{\circ}$ footage.
3. Precision Positioning: Finding the Sweet Spot
Where you place the camera is the foundation of your $360^{\circ}$ composition.
Center of Action: Place the camera at the logical center of the action or space for the most balanced $360^{\circ}$ coverage.
The Eye Level Rule: Adjust the height depending on the scene. Eye-level is generally best for realism (making the viewer feel present), while a slightly higher angle can work for showing landscapes or factory layouts.
Stay Clear: Avoid standing too close to the camera.7 Operators can easily appear in the frame. For static shots, establish a safe hiding spot or use the remote trigger from a distance. [Common Mistakes: Subject too close]
4. Connect, Calibrate, and Monitor Live
Never shoot blind. The controller app is your digital viewfinder and calibration station.
Connect Remotely: Use the Insta360 Pro Controller App (or a laptop) to connect via $\text{Wi-Fi}$ or $\text{Ethernet}$—the Farsight system is best for distance.
Check the Frame: Monitor the live preview to confirm framing, ensure the horizon is level, and check for parallax issues with close objects.
Manual Control is King: Adjust ISO, Shutter Speed, and White Balance manually. Automatic settings will lead to jarring exposure shifts in $360^{\circ}$ footage as the camera moves between light and dark areas. Lock those settings down! [Insta360 Pro 2 Best Practices]
5. Final Checks and Recording
Lens Cleanliness: Double-check that all six lenses are spotlessly clean.8 Use a microfiber cloth—a single smudge on one lens is a massive post-production nightmare. [Don'ts of Filming 360 Video]
Start Smoothly: Press record and wait a moment before action starts. Avoid moving the camera suddenly during the shot; rapid movement creates stitching errors that are difficult to fix.
Capture Quality: Ensure you are capturing in the highest necessary resolution
6. Post-Shoot Protocol: Securing the Data
The shoot isn't over until the data is safe and organized.
Data Transfer: Immediately transfer files from all seven memory cards (six lens cards + one internal proxy) and the main $\text{SSD}$ to your secure editing system.
Stitch Professionally: Use Insta360 Stitcher or a dedicated third-party tool for frame stitching.9 This is where you correct minor parallax and finalize the spherical image.
Enhance and Finalize: Apply professional color grading, brightness adjustments, and finalize the FlowState stabilization in your editing software for a clean, professional finish.
Ready to elevate your $\text{VR}$ content to professional standards?
Contact Viral Gala at 360 vr photography: 9920322366
Explore Our Professional $\text{VR}$ Services: 360vrphotography.com or 360vrphotography.in
Recommended Video Guide
To see the common mistakes mentioned in the workflow and how to avoid them in your own production:
[8 Common 360 Video Mistakes (and How to Fix Them) - YouTube](https://www.youtube.com/watch?v=R9YqWJgM_B8)

Experience
Engaging virtual tours for real estate and events.
Innovative
Immersive
info@360vrphotography.in
+91 9920322366